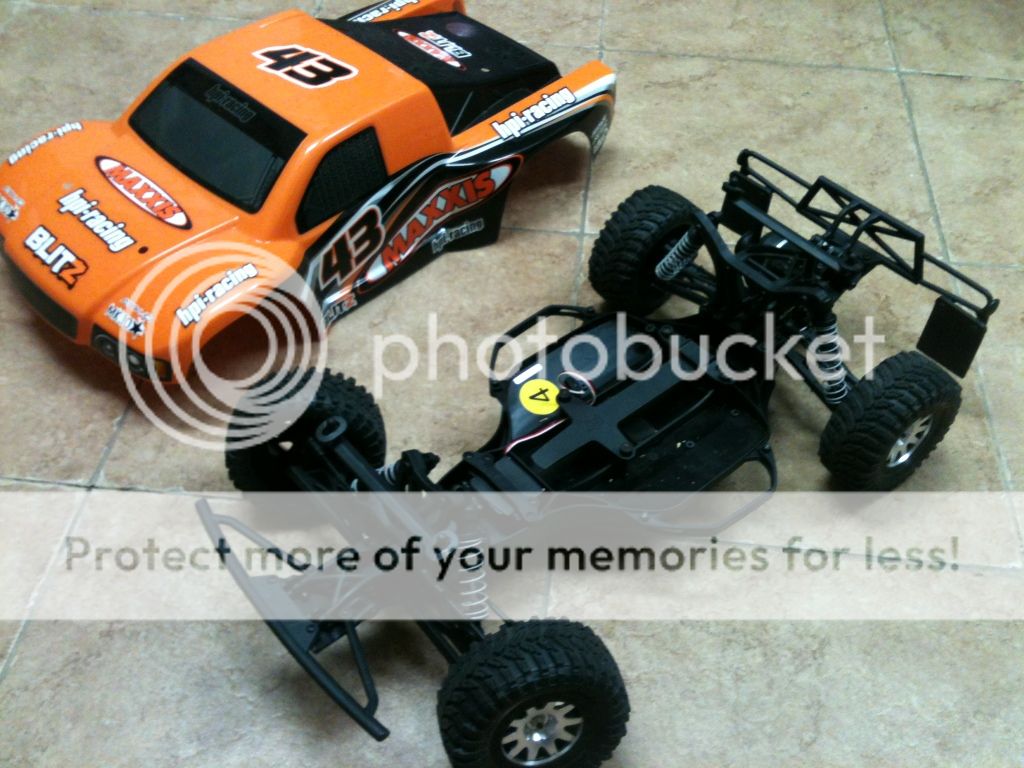
Over the next couple weeks I'll be going over my blitz build. Like every truck it had it's pros and cons. When build properly the blitz can be a great contender and finish every race, every time. We will be taking a COMPLETELY STOCK, brand new roller and turning it into a podium finisher. Stay tuned
Poor steering (truck pushes out of the box) Outdrives wear quick tie rod position limits steering Parts must be purchased in trees x-rings wear quickly Parts that break: steering rack, rear suspension mount, front carriers (with a good hit)
And the Pros:
Adjustable Rear Toe and Anti-squat Threaded shocks (very durable) Tough and ridged plastic all-around Adjustable body height Easy to work on. Consistent handling Hi Temp bearings all around Solid all metal tranny and sealed diff Adjustable shock position and ball stud position
Since the Short course scene came out, I have owned a few trucks. Like a lot of us, I started out with a slash. It was a good truck but very limiting when it came to adjustability. After many trials and experiments I gave in and bought a blitz. Ran it for a while and then the new Losi XXX-SCT came out. I purchased an all out race roller with every CR upgrade. It was hit and miss with the truck. Since it was XXX-t based (back when motors were all brushed), a lot of parts seemed to loosen up or break. That was frustrating. Now having owned quite a few blitzes, I know exactly how to set one up to be durable and competitive. Soon we will address the CONS of the truck and use the PROS to our advantage. Stay tuned
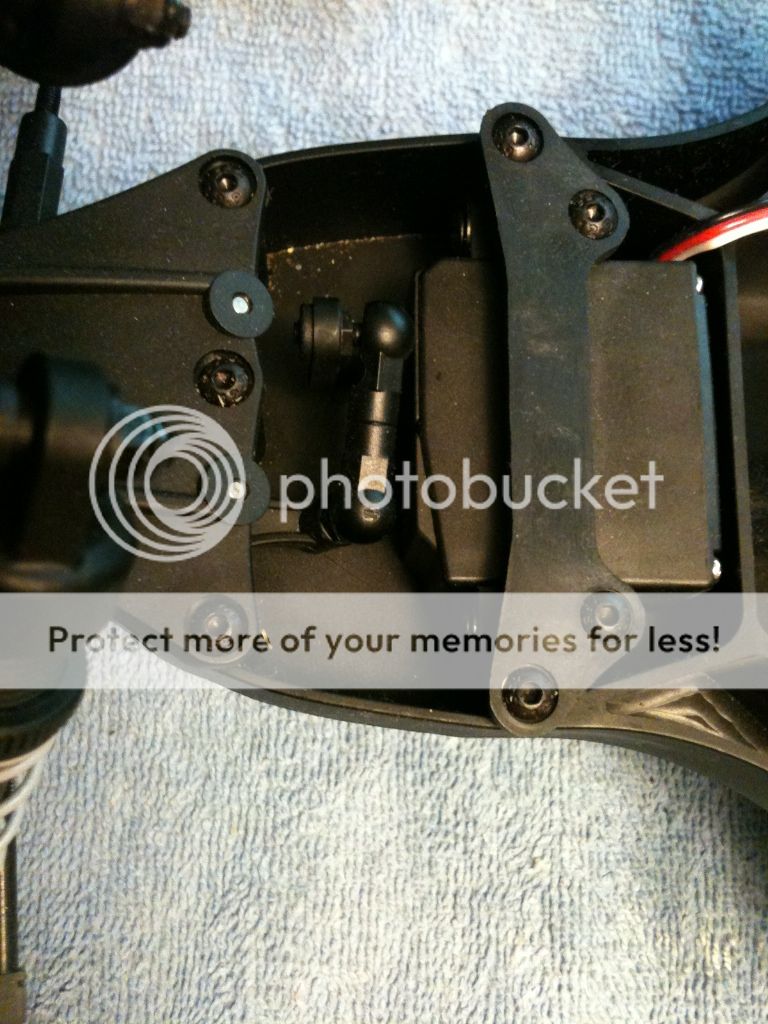
The Biggest complaint that most Blitz owner have is the steering. Let's address that first.
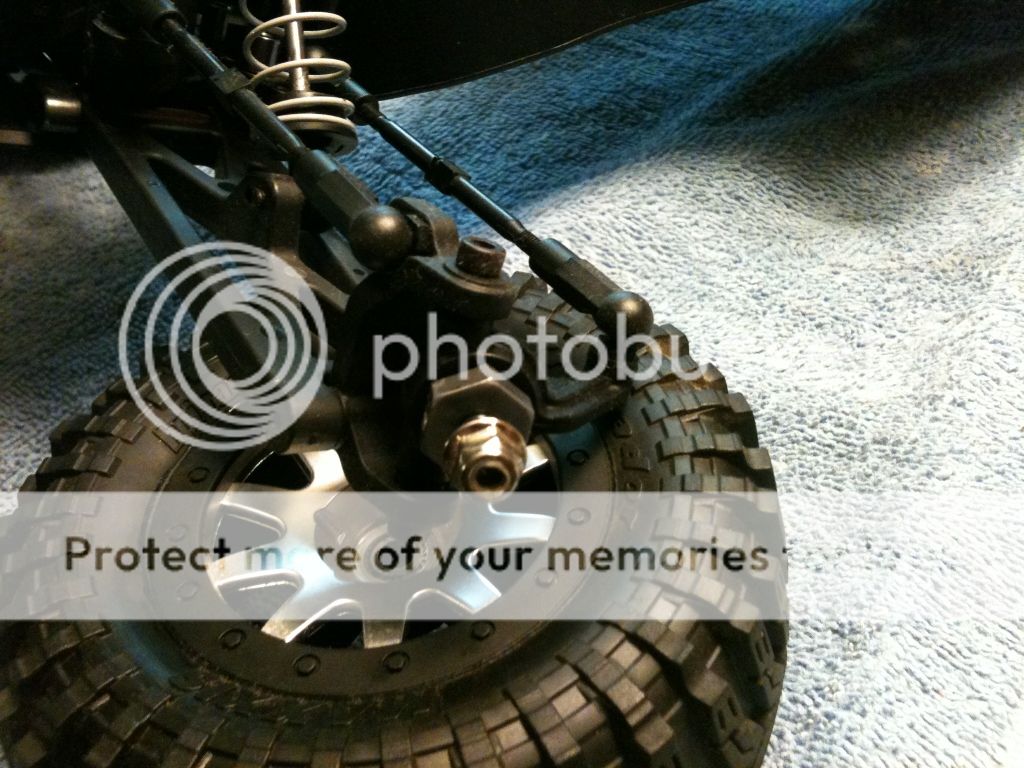
Below is what the the stock steering setup-
As you can see the steering rack has a built in servo saver. This is a great feature if you want to bash but for racing its just too loose.
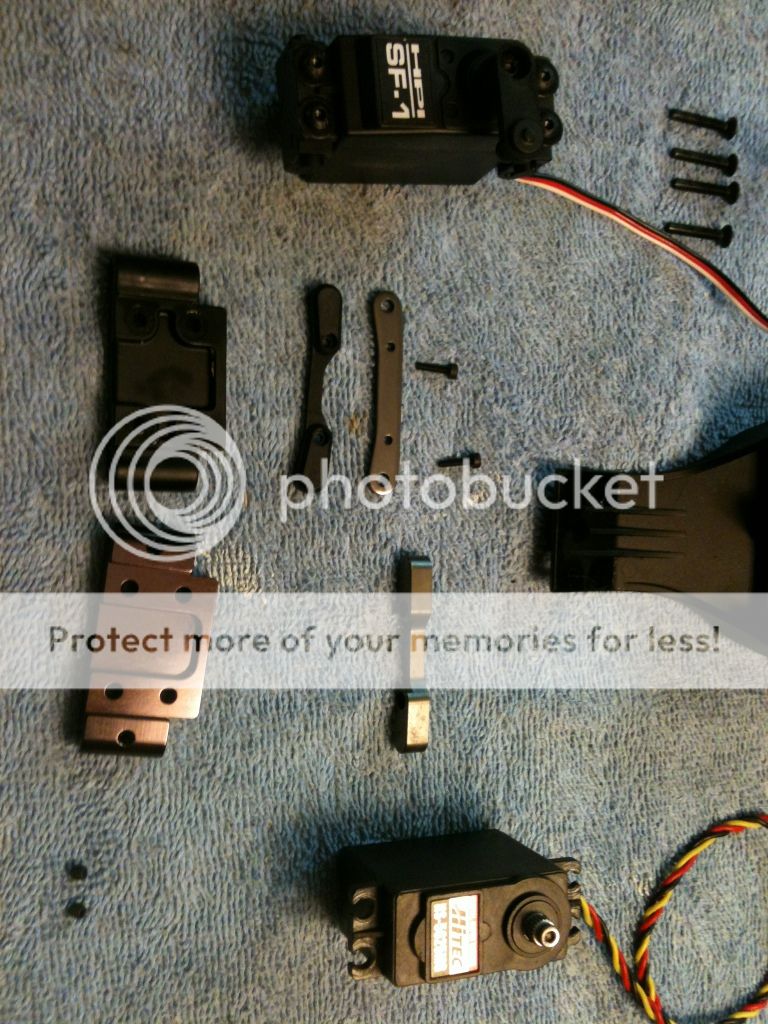
The Fix- Remove front end of truck (5 bolts on top, 4 on bottom)
Budget Fix- Apply a small amount of medium locktite to threads of servo saver. Tighten nut all the way down and then come back a 1/4 turn. Re-assemble. Optional -Upgrade servo to Traxxas 2075 ($21 on ebay)
All out fix- STRC Steering rack, Blitz ESE bearings for steering rack, Blitz ESE Aluminum bulkhead, Metal Gear Servo, STRC hinge pin cap. Lock Servo saver all the way down.
By simply applying the budget fix, you will quickly notice a change in the response of the truck. I ran the stock steering rack and a traxxas 2075 for a long time and did well. The stock steering rack does have a weak spot though so never lock a plastic rack all the way down. Backing off a 1/4 turn gives you a small amount of play saving your servo and rack, allowing you to finish every race. Also remember if your going with the aluminum steering rack, you will need to upgrade to a metal gear servo. Next I will be covering the Inline and trailing front hub carriers. If you have any questions so far, please feel free to ask.
AirborneHoosier
Posts : 185 Join date : 2011-08-26 Age : 55 Location : æ♠æ♣æ♥æ♦Æ♦æ♥æ♣æ♠æ
a lot of parts seemed to loosen up or break. That was frustrating.
Losi should make that their slogan...
ExcelMarketTX Admin
Posts : 668 Join date : 2011-05-05
Subject: Re: HPI Blitz Build 101 Sat Aug 04, 2012 2:37 am
Ha thats pretty funny! Stinks cause I grew up loving the XXXT. Back to the build
Since we are up front lets talk about the hub carriers. Out of the box the trailing hub carriers are offset and the axles do not directly pivot over the mounting hardware. This is good for accelerating out of a turn but limits your turning ability coming into the turn. The In-line hubs are good for coming into the turn. Back when Hal's layout was not as technical, the trailing hubs were great! I tried the inline hubs and experienced a lot of oversteer. When Running a small, technical track like bobby's backyard track, the In line hubs without a doubt were the way to go!
We all have different driving styles. For this build I'm going over to the in-line hubs. When going from the trailing(offset) hub to a in-line hub, make sure to remove the washer at the back of the axle. Hold onto them though in case you want to go back to the trailing hubs. Everything else goes back where it was. This is also a good time to set your EPA. Do this with the arms level. Both hubs have small limiters. Your going to want the hubs to slightly tap the arm at full throw. Any more throw and the rack is just loose and you can loose control.
ExcelMarketTX Admin
Posts : 668 Join date : 2011-05-05
Subject: Re: HPI Blitz Build 101 Sat Aug 04, 2012 3:21 am
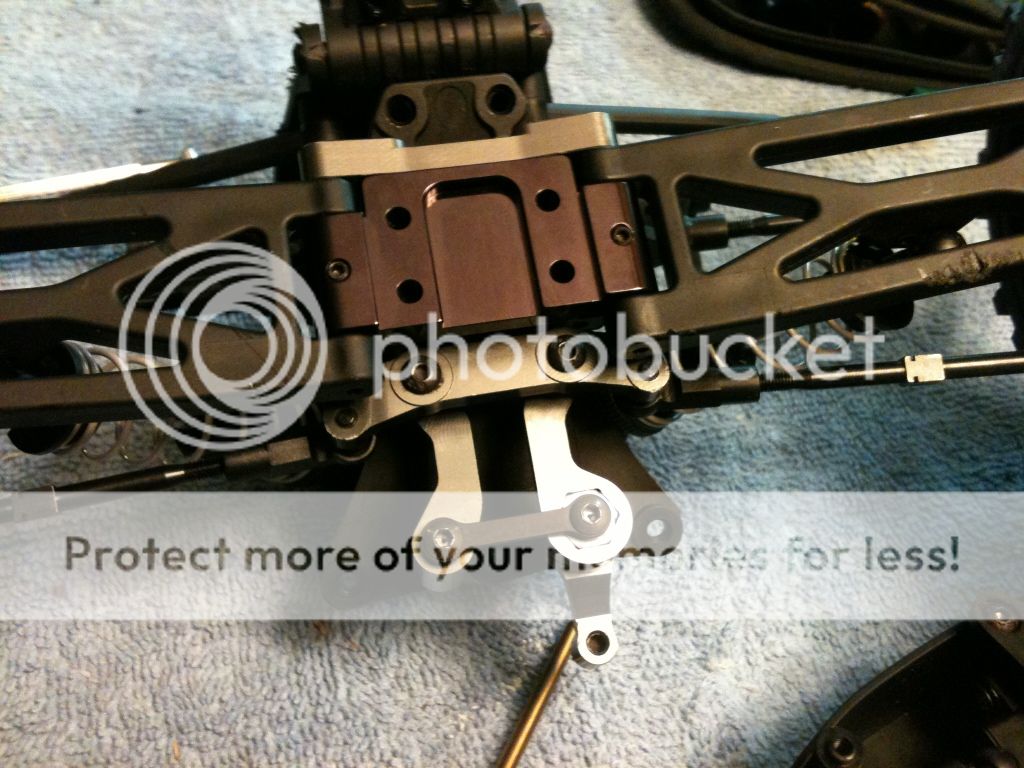
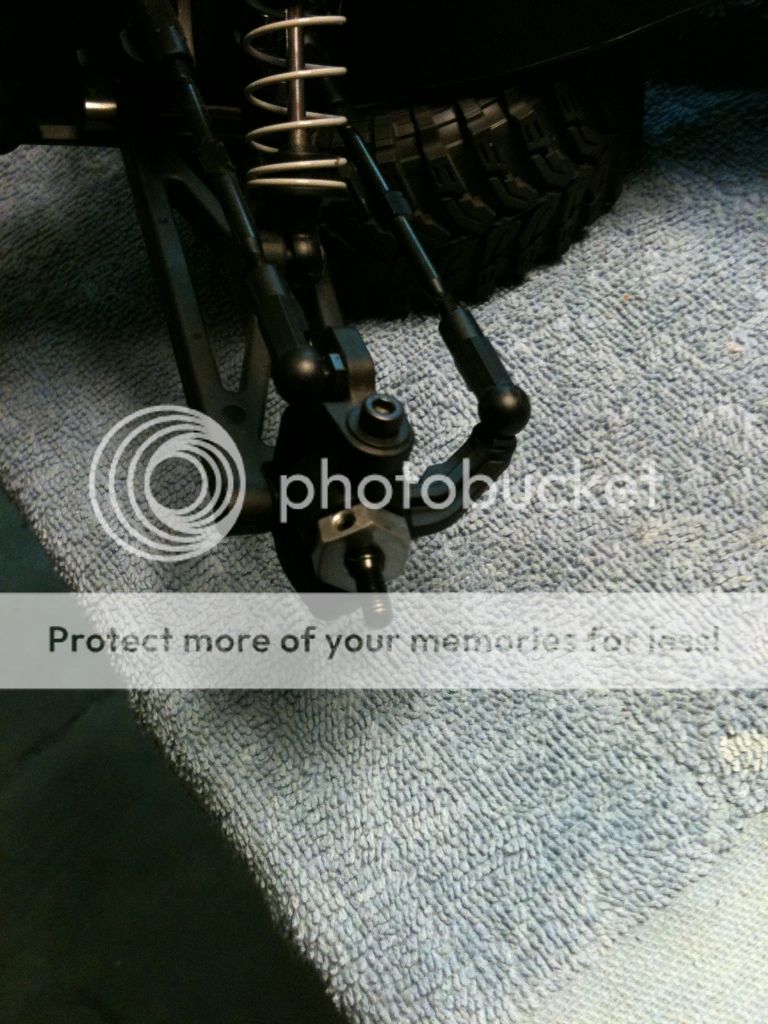
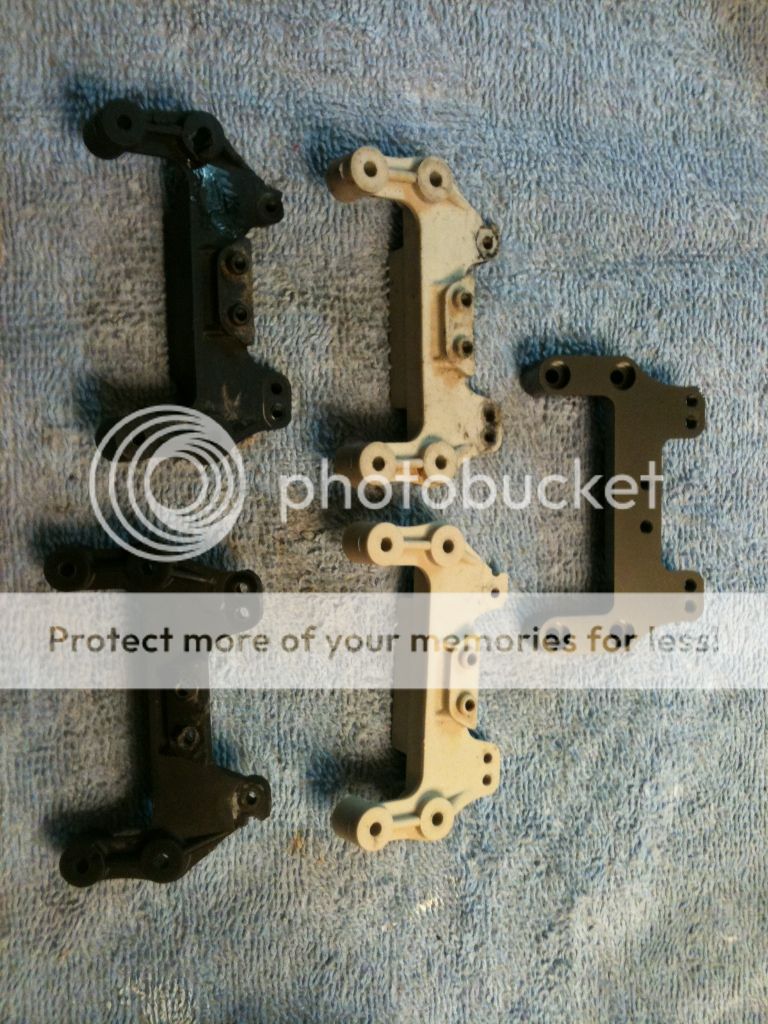
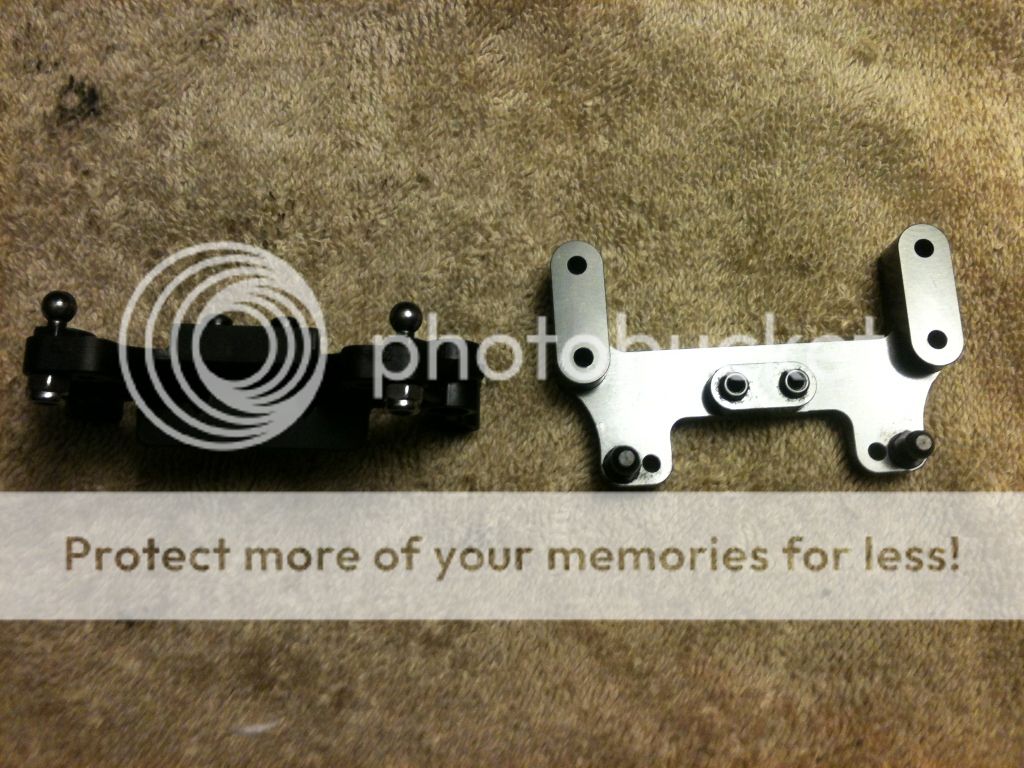
The next part that you are going to want to replace or beef up is the rear suspension mount. This mount has 2 positions for you to place your rear ball stud. Unfortunately the best position is on the outside and this makes the stock plastic part break easier. So does bad x-rings in the diff and the outdrives rubbing against it but we will address that later. Below you'll see a graveyard of plastic rear mounts! And the top mount is an STRC Aluminum mount.
The stock HPI parts bag that includes the Rear Suspension mount(along with other plastics for a Firestorm you'll never use!) runs $15.00. The STRC aluminum mount runs 12.99. So Above is 60 bucks worth of scrap that can be replace by a 13 dollar part. The broken parts come from trucks I've bought and sold so I was not the only person that had the problem. But if your on a budget and you have not broken you stock mount, you can simply back the studs up with nuts as seen below. This slims your chances of breaking the part and does not interfere with the arm throw.
ExcelMarketTX Admin
Posts : 668 Join date : 2011-05-05
Subject: Re: HPI Blitz Build 101 Sun Aug 05, 2012 8:02 pm
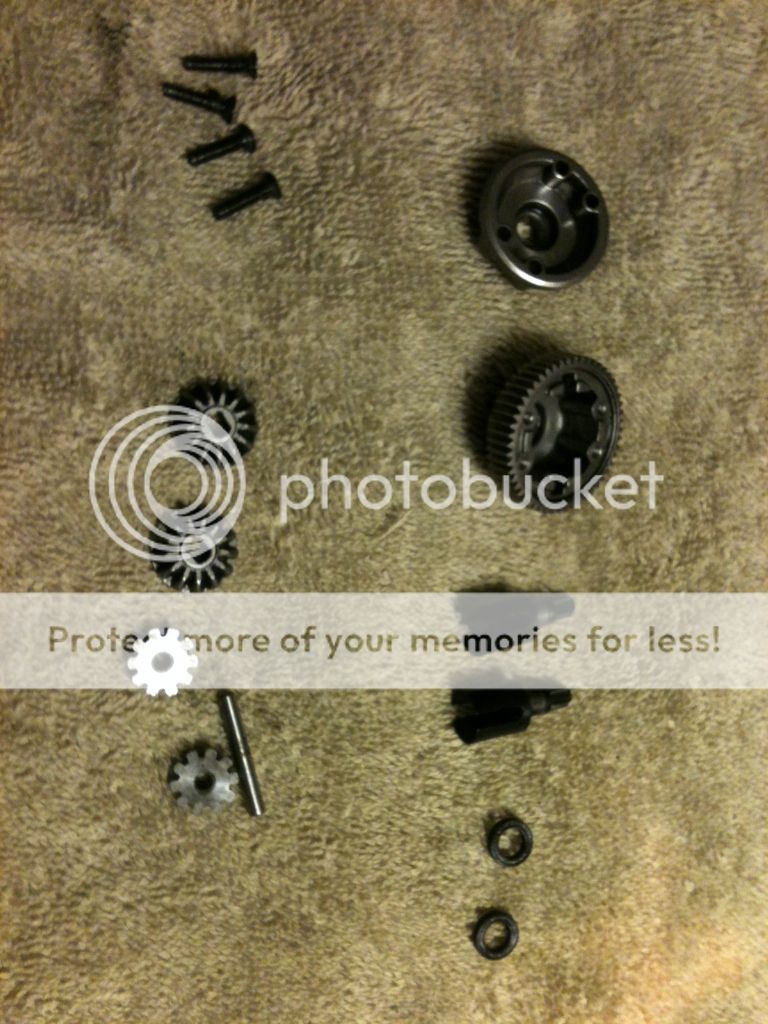
Since we already have the suspension mount off lets get right to the transmission. The easiest way to pull it out is by removing the the top four bolts and two bottom bolts. pull it up and pull it right -> out (if looking at truck from rear). Them pull the five bolts from the transmission (four mount to the plate and one at the bottom of the transmission. Lets bust open the diff! Make sure you don't loose the thin shim on the outdrives. The diff comes open with four bolts.
The biggest complaint about the rear end of the blitz is the outdrives wear quickly and then rub against the rear suspension mount. This happens for two reasons. The stock x-rings and junk and the outdrives are soft. If you have a torch or know somebody that does, place the outdrives on a third hand and blast them until they are literally red hot! Then dunk them in cold water. Repeat once again. This is what a blitz with worn outdrives and x-rings look like:
This is how you harden them:
ExcelMarketTX Admin
Posts : 668 Join date : 2011-05-05
Subject: Re: HPI Blitz Build 101 Sun Aug 05, 2012 8:33 pm
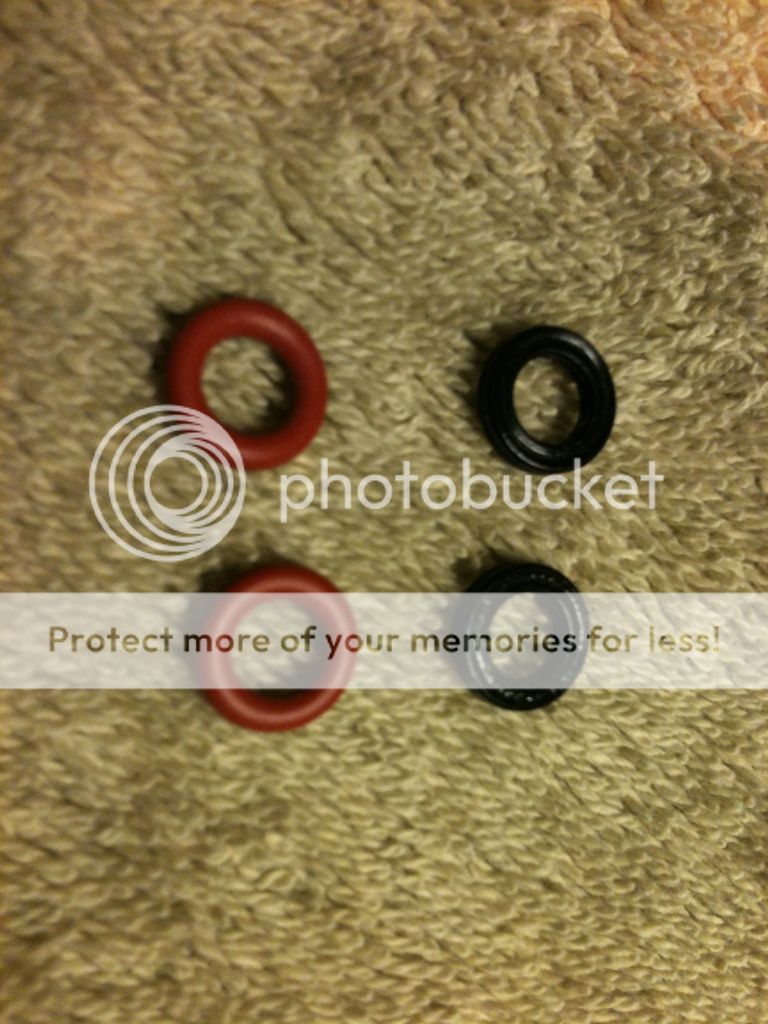
Now that your outdrives are hardened, lets talk about the x-rings. I was fortunate enough to end up a crashbox that had a bad full of orange o-rings to replace the stock faulty x-rings. TSRproducts.com sells 6 of their pro seals on ebay for 11 bucks. Or you can go to your local hose shop and ask them for 1.6 x 5mm orange o-rings.
In this build used diff oil now that the diff is sealed with out new o-rings. When Installing the o-rings place a small out of diff oil inside the diff case where the o-ring goes. Place o-ring inside. Then Place a small amount of diff oil on the inside of the o-ring. Push the outdrives throught the o-ring from the inside to insure it sets properly. Pull it out slowly turning it back and forth while backing out to insure the o-ring doesn't come out with the outdrive. Then insert the outdrive in place from the outside, turning it back in forth again while going in the insure the o-ring doesn't pop out of place. Then install the gear and e-clip. Repeat for the other side. Install the gears and fill diff with ____wt. Oil. Can't give you all my secrets lol So lets just say I'm thinking of a number between 0-30. Spin the outdrive a couple times and then place a little more fluid leaving a small space for the fourth diff gear. Place fluid on case where the seal goes and on top of the seal and close it up.
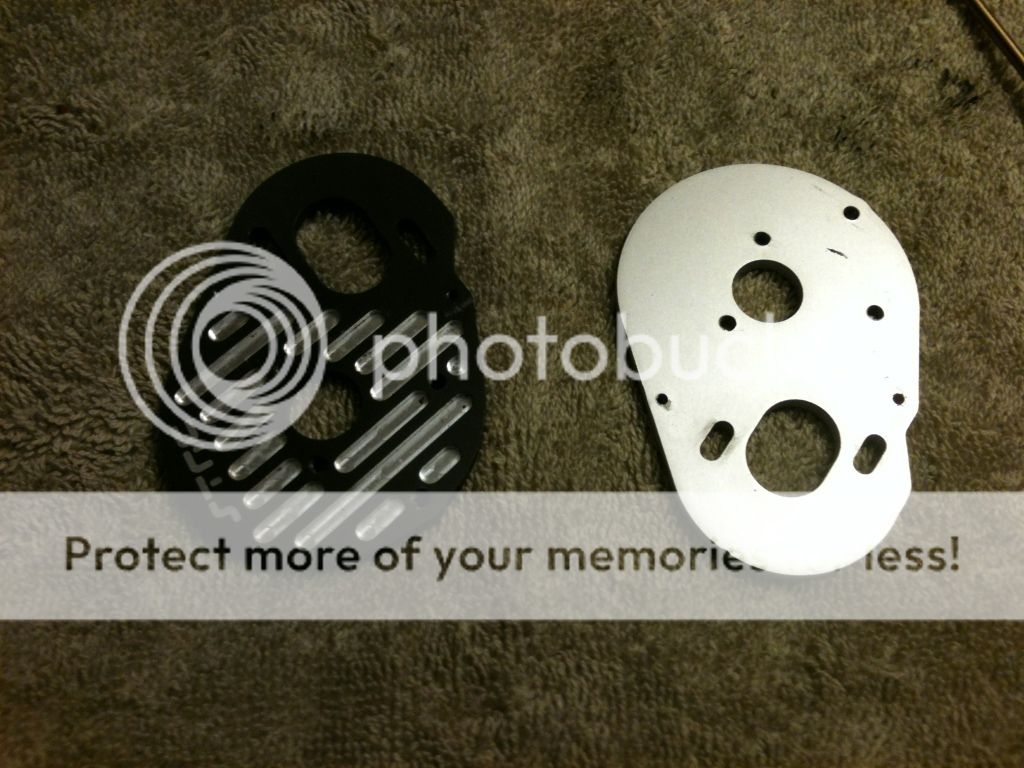
Before you seal the tranny lets talk about the top gear and motor plate
ExcelMarketTX Admin
Posts : 668 Join date : 2011-05-05
Subject: Re: HPI Blitz Build 101 Sun Aug 05, 2012 9:12 pm
At this point of the build I want to remind you that this is my personal build. Some parts that I've installed are not necessarily a must to be competitive at the track. I've done well with a bone stock blitz with a vxl and learned a lot along the way after several builds. Let's continue
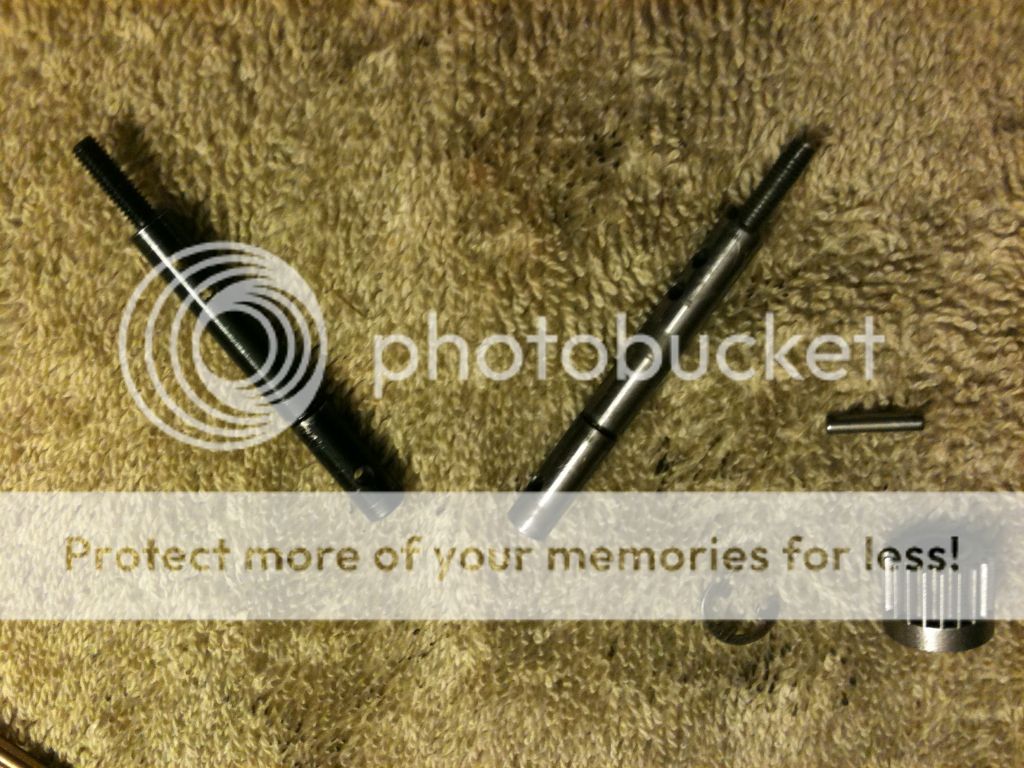
The stock top shaft is made of steel and is tough as nails! I have never had a problem with the stock shaft but opted for the ESE light weight shaft. It is also tough and nails and helps the drivetrain spool and stop quicker. Make sure if you replace the the top shaft you don't forget the plastic piece that goes on the inside end of the shaft between the gear and bearing. Also DON"T loose the 2-pins that set the slipper assemply in place! They are shorter than the wheel hub pins and are only sold in a complete slipper kit. In the event that you do loose one, simply dremel down a wheel hub pin to size.
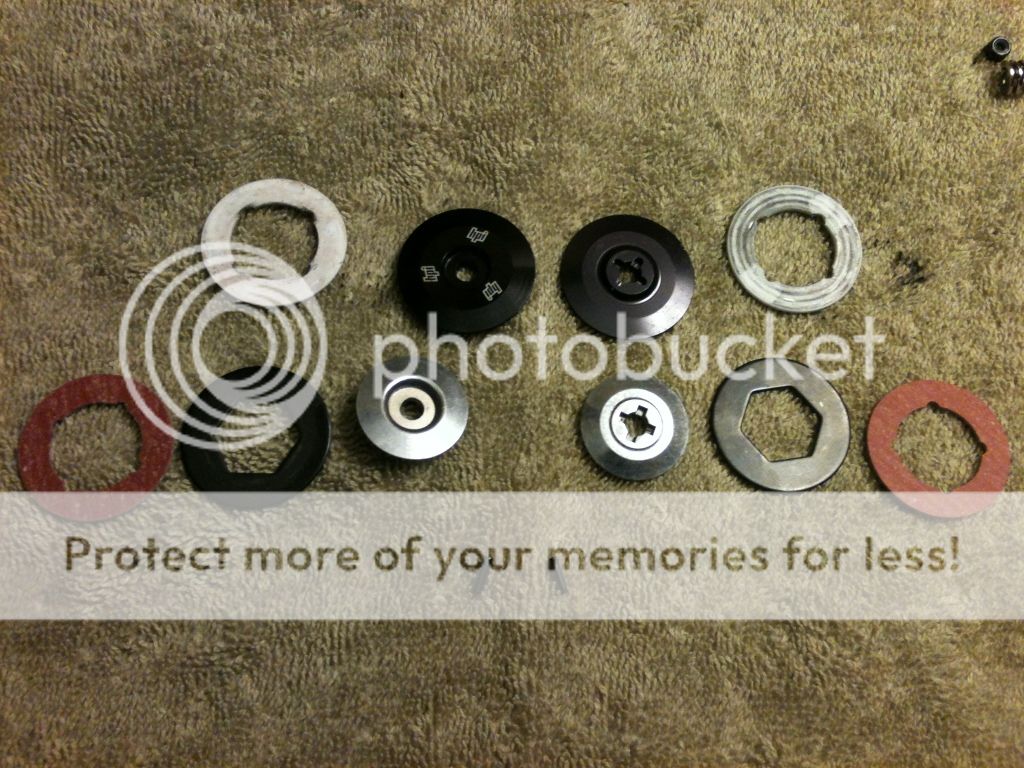
Another option part I installed installed was the ESE lightweight slipper assembly and high temp slipper pads. The lightweight kit consist of 2 parts apposed to 4 which makes changing the spur much easier. Also it helps your drivetrain spool and stop quicker. Win win. After the first time you have to change a spur at the track, you will want to spend the 13 dollars and get the ESE assembly.
I also installed STRC's lightweight motor plate in the gunmetal finish. It is slightly lighter than the stock plate and is finned to help dissipate heat from the motor. It's a nice 10 dollar upgrade.